An excessive amount of cymbal wash in the overhead mics is one of the common things that producers and players encounter during drum mixing. As we all already know, cymbals form a significant segment of a drum kit. However, in case of an excessive number, the mix may be overcrowded or disoriented. It gets particularly frustrating when you are looking to hear the snare, toms or kick drum only to hear a smack of cymbals instead. Whether you are mixing live or in the studio cymbal wash can have a huge effect on the sound of your drums. To enable you to get more even overheads and a bit less cymbal wash, these tips and tricks can be found useful.

Pick the Right Way to Use an Overhead Mic
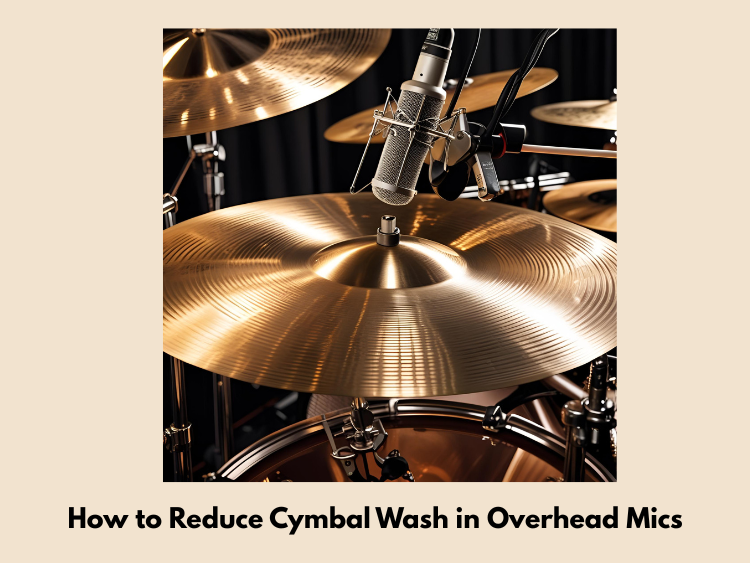
The amount of cymbal wash you capture depends heavily on your overhead mic placement.
Spaced Pair: The approach provides you with a broad stereo image, although, as the mics on the drums are nearer the drums themselves, it tends to capture more wash on the cymbals. This may be a solution as a last resort: move the mics a bit higher or bring them slightly closer to the middle of the kit.
XY or ORTF: In these setups, the mics are close to each other and pointed outward. Putting the mic in this position can help fix phase problems and calm down loud cymbal transients while still getting a stereo picture of the kit.
Glyn Johns or Recorderman: These standard methods put more emphasis on the kick and snare drums than the cymbals. They can make the kit sound more balanced with the cymbals not being the main focus.
Try different places for the mic until the drums sound present without drowning out the rest of the kit. Moving things just a few inches can make a huge difference sometimes.
Record the Complete Drum Kit Using Overhead Microphones
In many situations, people are mistaken when they imagine overheads to be the so-called cymbal mics. As opposed to that, consider them as kit mics that capture the entire sound of the drums. More likely to show up as cymbal wash are your overheads, which can be over-emphasizing the decay or sustain of the cymbals, instead of just getting the whole kit sufficiently balanced.
Lift the overheads in order to see the entire kit more clearly, and pull the mics off the drums. Attempt to have the sound be balanced, when the drums, toms and cymbals all have equal volume.

Use EQ to Soften Harsh Sounds
Once the tracks are taken, with the help of EQ, eliminate the excessive amount of cymbal wash:
High-Shelf Attenuation: If your overheads sound overly bright, an easy high-shelf cut between 10 and 12 kHz can tame the sheen and bring the wash to a level that can be controlled.
Dynamic EQ or Multiband Compression: Although drums could also be the cause at times, cymbals are usually the champion of overwashing. An easy way of limiting cymbal transients would be to use a dynamic EQ or multiband compressor of the high end of the sound (8-14 kHz on this example). This will not make the general tone blunt.
Midrange Carve: In case snare or tom sounds are creating hindrance, then reduce a little in the range of 500 to 800 Hz. This would clarify the muddiness in order to distinguish other drums more clearly.
Spot Mics Give You More Control
The snare, toms, and hi-hat must be miked with close mics rather than being mic with overheads. This provides you with a greater variety of mixing. With good spot mics, you are able to cut the overheads or even add more EQ without fear of losing the crisp sound of the drums.
Even engineers go ahead and send their overheads past 400-500 Hz when the mix is extremely busy and add additional body and punch by using close mics. Learn more about spot mic setups in this live gig drum mic buying guide.

Use Compression in Parallel Smartly
Parallel compression is a great way to make drums sound more exciting, but if you’re not careful, it can make cymbal wash sound worse. If the drum tails are coming up too much on your compressed bus, try these things:
- Apply a high-shelf cut on the parallel bus to tame harsh cymbal frequencies.
- In the production mix, put the kick, snare, and toms only on a parallel compression bus so as to minimize cymbal wash.
- Add a multiband compressor to that bus and target primarily the high frequency sounds. Then, keep the bottom end and midrange alone.
If you’re unsure what kind of mic suits your needs, check out this dynamic vs condenser mic comparison.
Reflections in the Control Room
Your overheads might pick up cymbal echoes off of walls and ceilings if you’re recording in a small room that hasn’t been treated. This makes the sound washy and spread.
Put some kind of sound walls or ceiling clouds over the kit in the room you will be recording in. Absorbing additional high-frequency waves provides a cleaner sound that is tighter and higher. You yourself can do this.
You’ll also want to make sure your kick sounds clean in that space—here’s a guide to the best kick drum mics to help with low-end punch.
Conclusion
Remove cymbal wash in overheads by intelligent microphone placement, proper mixing techniques and instrument choice. The idea is not to completely eliminate cymbals in the mix, rather the cymbals are supposed to mingle with the other instruments in the drum kit.
Give these ideas a go the next time you lay out your overheads, or mix the drums. Minus the cymbal fluff, your snare drums will beat, your tom-toms will cut and your mixes will be crunchier and more effective.