For any audio engineer, one important part of recording a drum kit is setting the overhead drum microphones, as they are essential for getting the full, natural sound of the kit. Close mics ensure that all the individual drums can be focused on, but they don’t have the overall balance that overhead mics provide where you’ll get all the cymbals, the ambiance, and the full stereo image of the kit. If you’re recording in the studio or if you’re performing live, the overhead mics you choose or the way that you place them can drastically improve the sound of your drums. In this guide, we’re going to go over everything you need to know about overhead drum mics, their best types, placement techniques, and our top recommendations.
The Importance of Overhead Mics for Drum Recording
Overhead mics do more than simply record cymbals; they add depth, space, and balance to your mix of drums. Here’s why they’re crucial:
- Cymbals with Clarity: Overhead mics generally capture the shimmer and detail of cymbals better than the close mics.
- Balancing the Kit: Rather than relying on individual drum mics to reproduce the full kit’s sound, overheads capture the natural sound of everything in the kit.
- Bringing Depth to the Soundstage: Well-placed overhead mics can make your drums sound wider and more stereo.
- Natural Reflections: They record natural room reflection, which adds room ambiance to the recording.
Types of Overhead Microphones
Now, there are two principal types of mic that get used for overheads:
Condenser Microphones (The Most Common)
In contrast, condenser mics are high-sensitivity, fast transient response, wide frequency range mics—so they are the mic of choice for overheads. They also capture the sparkle of cymbals and the nuances of the drum kit with great clarity.
Small-Diaphragm Condensers
- These have a lot of crisp detail and fast transient response, making them perfect for bright cymbals and intricate drumming styles.
- Examples: Neumann KM184, Audio-Technica AT4041.
Large-Diaphragm Condensers
- These pick up more warmth and body, making them popular for a deeper, more natural drum sound.
- Examples: AKG C414, Rode NT1-A.
Ribbon Microphones (If You Prefer a Vintage, Smooth Sound)
- Ribbon microphones give a smooth and natural response, which is why they are often chosen for jazz or vintage-style drum recordings. But they’re more fragile and high SPL-sensitive, so they must be handled with care.
- Examples: Royer R-121, AEA R84.

Top Overhead Mic-Placing Techniques
Overhead placement is the key to getting the best sound you can from the overheads. Below are the most prominent techniques:
Spaced Pair (A/B Setup)
- How It Works: Two mics are set up a few feet apart, each an equal distance from the snare, generally above the left and right cymbals.
- Pros: Creates a large stereo image.
- Cons: Can introduce phase issues if not located properly.
X/Y Configuration
- How It Works: With two mics in close proximity and angled at 90 degrees.
- Pros: No phase issues, delivering a balanced stereo image.
- Cons: More mono-phonic approach than spaced pair.
ORTF Configuration
- How It Works: Like X/Y, but 17 cm apart and at an angle of 110 degrees.
- Pros: Avoids phase issues and maintains more natural stereo spread.
- Cons: Needs vocal mic positioning to sound its best.
Glyn Johns Method
- How It Works: One mic is situated above the drummer’s head and another near the floor tom, facing the snare.
- Pros: Uses minimal mics to capture the full kit.
- Cons: Must be balanced very carefully to prevent an uneven stereo image.
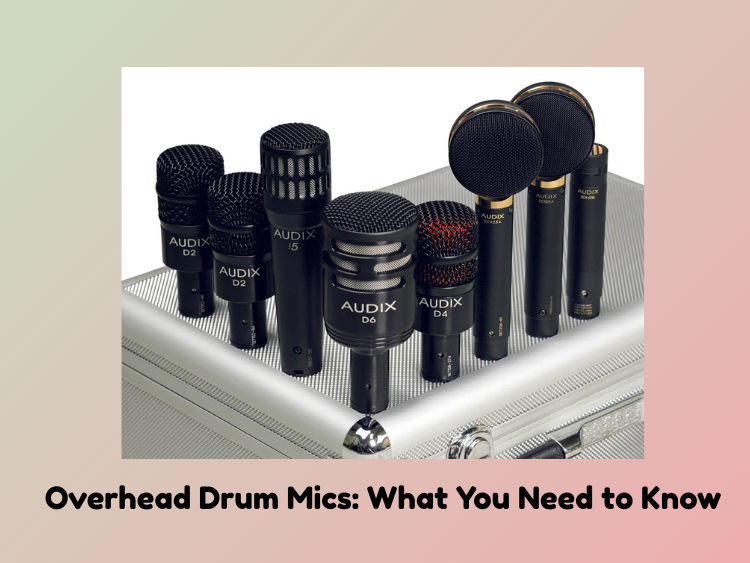
Best Overhead Microphones for Drums
Below are some of the most popular overhead mics, offering everything from pro-studio-grade to low-budget options:
High-End Choices
- Neumann KM184 – Exceptionally clear sound, ideal for professional studio recording.
- AKG C414 – Workhorse mic with various polar patterns, great for detailed overheads.
- Royer R-121 – A warm and vintage-sounding ribbon mic.
Mid-Range Choices
- Audio-Technica AT4041 – Depending on your in-studio mic technique, this small-diaphragm condenser provides bright, detailed cymbals.
- Shure SM81 – A dependable choice with a natural and flat frequency response.
Budget-Friendly Choices
- 5Core Overhead Condenser Mics – These are a good budget option to consider if you want to save money and not compromise on too much quality.
- Rode NT5 – Budget-friendly and perfect for home studio setups.
Advice to Help You Get the Best Overhead Drum Sound
- Apply a High-Pass Filter: Overheads don’t require much low-end, so it might be beneficial to apply a high-pass filter (below 100Hz) to clean up the mix.
- Balancing with Close Mics: Overheads can often poke out of the mix if the mics are too loud, so peel back slightly on their volume to better sit in a mix with snare, kick, and tom mics.
- Try Positioning: Change the mics a little bit to change the amount of the kit being picked up. Small tweaks can have a huge impact.
- Phase Issues: When mics are out of phase, the sound becomes weak or hollow. If the sound does not improve, flip the phase switch on one of the mics and try again.
Conclusion
An overhead drum mic is a vital component in achieving an amazing drum sound, both in a live performance and in a studio recording. The type of mic, how they are put, balanced panning, and proper mixing to isolate each kick will make the sound of the drum explode. High-quality condenser mics, be it the Neumann KM184 or cost-effective options like the 5Core Overhead Condenser Mics, can get you professional drum sound clarity and the much-needed balance.
Knowing how to properly utilize overheads will help you to get the best out of your recordings and performances so that your cymbals sparkle and your kit sounds full-bodied and lively.
All Comments
This text is like a cup of fine tea — soothing, warming, and quietly profound.