
You don’t need a massive studio or an expensive mic locker to get great drum recordings at home. What you do need is a practical, DIY approach and the right mindset. Budget constraints are real—but so is the potential to make your kit sound polished, tight, and usable in a mix with just a few smart choices.
This guide will show you how to build a home studio drum miking setup without draining your wallet, using gear that gets the job done without fluff or gimmicks.
How Many Mics Do You Actually Need?
Let’s start with a dose of honesty: most home setups don’t need a dozen mics. You’re likely working in a small or untreated room, which means less is more.
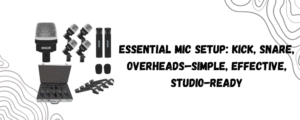
Here’s a proven budget-friendly format that delivers clean, balanced recordings:
- 1 Kick mic
- 1 Snare mic
- 2 Overheads (or even one, if you’re strapped)
That’s a 4-mic setup—classic, minimal, and totally workable.
If you want to go a step further, mic the toms individually. But only if your kit, room, and interface can handle it. Otherwise, you’ll just be inviting more phase issues and clutter into the mix.
Budget Mic Kits That Actually Work
The good news? You don’t have to cobble together different mics one by one. A bundled kit like the 5 Core 7-piece drum mic set gives you everything you need in one go.
You get:
- 1 kick mic
- 4 tom/snare mics
- 2 condenser-style mics for overheads or room
- Mic clips, mounts, and a hard carrying case
For the price, this kind of all-in-one solution gives you more control over your sound without the trial-and-error frustration of mixing brands or types.
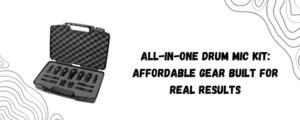
Even budget-conscious options like this offer enough quality to get you solid results in a bedroom or garage setup.
Where to Place Your Mics
Kick Mic
Place just inside the bass drum port or slightly outside if your drum has no hole. Closer placement gives you punch; farther adds more boom.
Snare Mic
Angle it toward the center of the top head, a few inches above the rim. Keep the mic out of the drummer’s way but close enough to catch that crack.
Overheads
Start with one directly above the snare, about 3–4 feet high. Add a second over the floor tom side for stereo width. If you’re tight on gear, just go mono overhead.

Tom Mics (Optional)
Only use if you have inputs to spare. Mount them low and tight but angled slightly toward the center of the drum.
Recording Interface: Don’t Bottleneck Your Setup
No matter how good your mics are, they’re only as useful as the interface you plug them into. For a 4- or 7-mic setup, you’ll need at least a 4–8 channel interface with decent preamps.
Stick with interfaces that offer combo XLR inputs, phantom power for overheads, and basic gain control. You don’t need anything fancy—just clean input.
Tips to Maximize Sound on a Budget
- Tame the Room: Blankets, rugs, and DIY panels go a long way. Untreated rooms cause more harm than cheap mics ever will.
- Check Phase: Flip the polarity of mics if things sound hollow or washed out. Always solo in pairs (kick/snare, overheads, etc.).
- Commit to Fewer Mics: Don’t mic everything “just because.” Focus on what needs clarity in the mix.
- Record, Listen, Adjust: Always track 30 seconds, listen back, and tweak positions before going all-in.
Realistic Expectations, Real Results
Look—we’re not chasing Abbey Road perfection here. But with a well-placed 4-mic setup and a kit that’s tuned and played well, you can absolutely get mix-worthy drum tracks from your home setup.
You’ll be surprised at how much clarity, depth, and energy you can get without the need for expensive gear—especially when you use a dedicated drum mic kit built to cover the essentials.
Final Word
You don’t need to break the bank to get professional results in a home studio. You just need to be smart with your gear, know where to place your mics, and listen critically.
Use a budget kit like the 5 Core 7-piece drum mic set as your foundation, treat your space, and focus on getting the performance right.
Budget drum recording isn’t about compromise. It’s about efficiency with intention. And that’s what makes all the difference.