Drum mics aren’t cheap, and they’re not invincible either. Between gigging, rehearsals, studio sessions, and transport, it’s easy for these mics to take a beating if you don’t store them right. But here’s the thing: mic damage isn’t always dramatic. It creeps in—dented grilles, weakened connectors, loose capsules—and slowly eats away at sound quality.
Whether you’re running a home studio or constantly packing gear for live gigs, how you store your drum mics directly impacts their performance and lifespan. Here’s what matters—and what to avoid—when it comes to storing your mic investment properly.
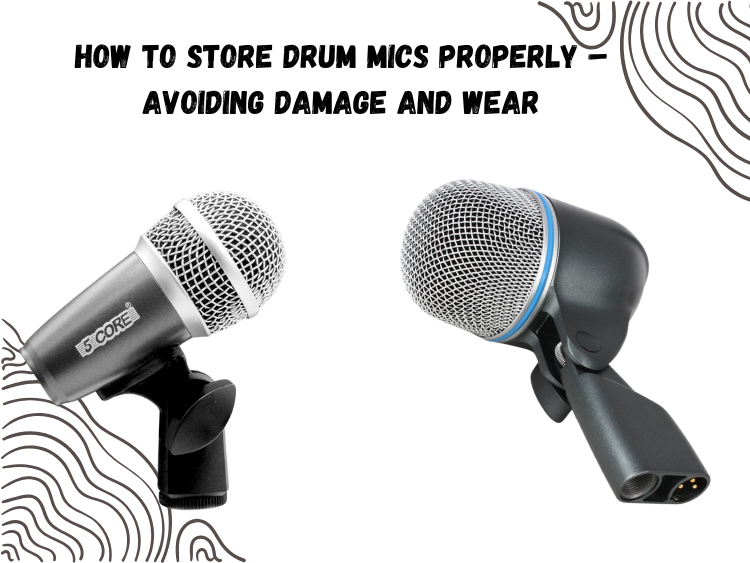
1. Always Use a Hard Case with Custom Padding
Let’s start with the obvious: if you’re tossing your mics in a backpack or wrapping them in a towel, stop.
A hard-shell case with custom foam slots is your mic’s first line of defense. It protects against impact, keeps mics from knocking into each other, and prevents the kind of jostling that damages internal components.
The 5 Core 9-piece Drum Mic Kit nails this—it comes with a full set of dynamic drum mics plus a rugged carry case that fits every piece snugly in place. No guessing, no shifting.
Interestingly, 5 Core even provides great discounts to business owners if you’re buying in bulk. Refer to this site for more information. Here’s also a one-stop platform where you can find all their products.
2. Keep Cables and Clips Stored Separately
Here’s a classic mistake: tossing mic cables and clips into the same case as the mics. It’s convenient, but it’s also a great way to scratch up your gear, bend connectors, and create an unnecessary mess.

Use a secondary pouch or compartment for accessories—especially clips with sharp threads or mounts with hard edges. The idea is to keep metal-on-metal contact to a minimum.
If your case doesn’t have separate storage built in, a small cable bag or pouch works just fine. Label it, keep it zipped, and you’ll extend the life of both your mics and your accessories.
3. Avoid Moisture at All Costs
Humidity is a silent killer, especially for diaphragm mics. Even dynamic mics—like those used on snare, kick, and toms—can develop rust or corroded internals if they’re stored in damp conditions.
Here’s what you do:
- Always wipe down the mic body after use—especially after live gigs where sweat, beer, and fog machines are in play.
- Store a couple of silica gel packets in your mic case to absorb residual moisture.
- If the mics have been used in a particularly humid environment, leave them out in a dry room for a few hours before sealing them up.
Taking a few minutes post-show beats replacing mics prematurely.
4. Wrap Each Mic (If You Don’t Have Foam Slots)
If you’re building your own storage solution or using a non-custom case, wrap each mic in a soft cloth before placing it in the case. Old t-shirts work in a pinch, but microfiber or fleece pouches are better.

You’re not just protecting the exterior finish—you’re keeping any loose parts from being nudged, shaken, or jarred during transport.
If you’re traveling often or gigging regularly, consider using foam inserts cut to fit your specific mic set. It’s a DIY upgrade that pays off fast.
For drummers looking for a reliable all-in-one solution, Shure DMK57 also includes a dedicated carrying case and full-metal mic construction, making it perfect for both travel and safe storage.
5. Protect Connectors and Threads
A bent XLR pin or damaged thread can put a mic out of commission faster than anything else. Always disconnect cables before packing up and double-check that no clip is left screwed in too tightly.
If your mic has a removable grille or capsule, make sure it’s secure before storage. For higher-end models or sensitive condensers used in drum room setups, dust caps or screw-on protectors are a smart investment.
And while it sounds basic, never store a mic while it’s still attached to a stand. That’s how threads wear out or get stripped.
6. Label Your Mics and Storage Slots
This is more about workflow than protection, but it matters. If you’re working with a full kit of drum mics—kick, snare, toms, overheads—it’s worth labeling each mic and the slot it belongs in. That way, you avoid cramming the wrong mic into the wrong space, bending clips, or damaging grilles.

You also get faster setups and fewer mistakes during rushed load-outs after gigs.
7. Don’t Leave Them in the Car
Mic elements, especially capsules and magnets, don’t like extreme heat or cold. Leaving your gear in the trunk overnight? That’s a fast track to degraded performance over time.
Make it a rule: once you’re home or back at the studio, unload your mics. Temperature swings alone can mess with calibration, even if the mics are in a case.
Final Word
Protecting your drum mics doesn’t require a vault—just some smart habits. Use a hard case like the one included in the 5 Core 9-piece kit, keep cables and clips separate, and avoid moisture and extreme temps at all costs.
Drum mics are built to take some abuse—but that doesn’t mean they should have to. Store them right, and they’ll keep delivering punchy, clean sound for years.