No need to empty your wallet in order to get a good drum sound. Even at the home recording stage, playing live gigs or setting up any studio for the first time, you can get crispy clear drums without spending a fortune on equipment. The trick is good microphone positioning, thinking of how to creatively use what you have and which elements of your arrangement are important. Here you will find tips on how to achieve professional results using affordable microphones at low costs in order to spend less time obsessing over your equipment and getting back to playing what you know best.
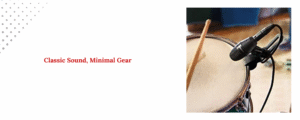
1. Use Less Mics at First
To record a good drum sound, you don’t need eight or more mics. A lot of old records only used a couple of mics. It’s amazing how full and natural a basic method can sound, especially if you’re working in a small or unheated room.
The “Glyn Johns” Method:
The Glyn Johns method, which only uses three mics, is one of the most celebrated basic settings.
- One overhead, which is above the catch and points down.
- One on the right of the drummer, pointing across the kit (often above the floor tom).
- One kick mic, which is not required but is suggested.
This set-up makes a perfect stereo picture and brings out the drum kit’s natural sound.
2. Pick Microphones That Are Easy on the Wallet Carefully
There are many powerful mics that don’t cost a lot of money. For those on a tight budget, here are some great options:
Kick Drum:
- AKG D112 MkII or 5Core drum mic (cheap and good).
AKG D112 MkII or Audio-Technica ATM250 . Learn more about kick drum miking techniques, inside vs outside the drum.
Snare:
- Shure SM57: The standard in the business. Long-lasting and useful.
Extra costs:
- The Behringer C-2 pair or the MXL 990/991 pair.
All-in-one kits: Some full drum mic kits cost less than $300. These come from brands like Samson, CAD, and Audio-Technica. These may not be the best, but they work well for home use.
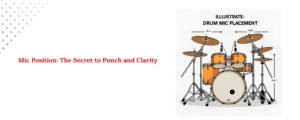
3. Where You Stand Is Very Important
It doesn’t matter how good the mic is if it’s not set up right. Try different places for the mic—it might make a bigger difference than buying new gear.
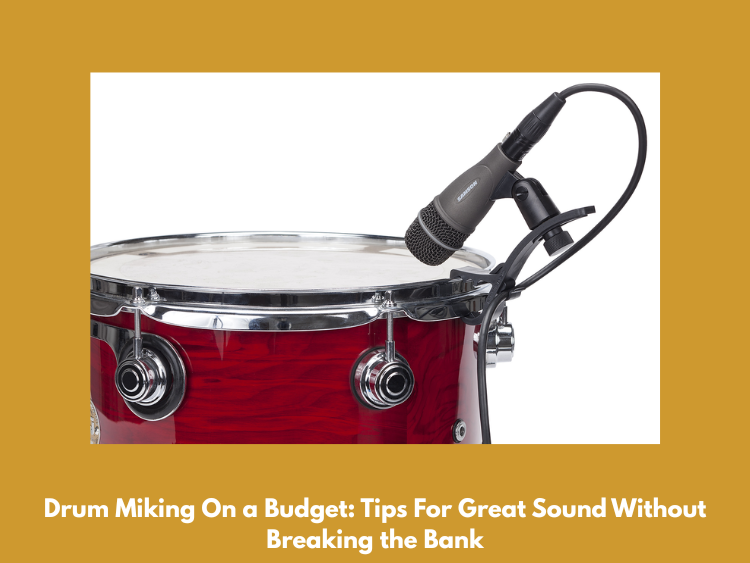
- Kick Drum: The hit is stronger when the mic is inside the drum, closer to the beater. The drum has more boom and force when it’s outside. For a great, punchy sound, check out 3 top hip-hop kick drum mics to get that punchy sound today.
- Snare: To get a deeper tone and less hi-hat bleed, aim just off-center and at an angle.
- Overheads: Symmetry is important. To have an ideal audio picture, maintain a constant distance between the speakers.
Tip: Use a string or tape measure when ensuring that the ceiling mics are positioned equal distance when compared to the snare.
4. Take Charge of the Sound in Your Room
The sound in a room can make or break a recording. Flutter echoes, low-end building, and strange shadows will happen in your room if you don’t fix it. You don’t have to get a full package of sound repair to make things better.
- Hang heavy blankets or duvets on the walls to fix noise problems.
- To cut down on floor echoes, put a rug under the drum kit.
- To trap walls, stack pillows or use cheap bass traps made of foam.
- If you can, record in the middle of the room or away from walls that are next to each other.
5. Make Use of What You Already Have
If you don’t have all of the drum mics you need, think outside the box:
- Voice mics that are dynamic can also be used for drums or toms.
- One condenser mic can be used as a ceiling mic or in a room.
- Even USB mics can be useful in a pinch theoretically, because USB mics can get used it can be good as a scratch track as long as you put them in the appropriate place.
It is good to have the right stuff during recording but it is also important that you can solve problems.
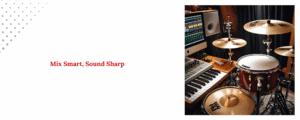
6. Fix It in the Mix in a Smart Way
You should “get it right at the source,” but smart mixing can make cheap recordings sound better:
- You can clean up low-mid muddiness or boost attack with EQ.
- To give it punch and regularity, add compression.
- If you think your room sounds too flat or dry, add some depth with reverb or room simulation tools.
- Designers of gates and transients can help shape drum hits and cut down on bleed.
If you’re a mixer on a budget, free or cheap plugins from TDR, Valhalla (Valhalla Supermassive is free!), and iZotope are great tools to have.
7. Check Your Tracks Phase by Phase
When using more than one microphone, problems with phase can make drum sounds sound thin or hollow. Always make sure the phases are lined up:
- Change the orientation of mics (especially overhead and drum) to hear what sounds better.
- To get it just right, use your ears or phase correction tools.
Phase is important, even with two mics, so don’t skip this step.
8. Lots of Practice Makes Perfect
The more frequently you use a switch, the better you will get a feel of what works in your room and with your equipment. It is not a bad idea to experiment with something new, make test takes and relocate mics.
Remember: A good drummer and a drum kit that is tuned well will make a bigger difference than any mic.
Conclusion
You do not have to have a studio full of Neumann and API preamps to capture great drums. Sharp and powerful drum sounds on a very small budget can be achieved by condensing the sound to a simple basis and positioning the mics correctly, and being prepared to roll up their sleeves and do part of the heavy work themselves. In order to sound good without spending much cash, here is how to do it. They are used to keep track of a demo, a YouTube video and even an entire album.