Getting a tight drum sound isn’t just about how you play—it’s about how you control what the mics hear. Without proper isolation, your snare bleeds into your tom mic, your kick leaks into your overheads, and everything starts sounding smeared and messy.
Want punch and clarity? You need to isolate.
Below are real-world mic isolation techniques that help reduce bleed, tame room noise, and tighten up your overall drum mix—whether you’re recording in a DIY studio or tracking live on a tight stage.
1. Start With Directional Mics
Your first line of defense is mic choice. Omnis and wide cardioids? Skip them. You want tight cardioid or supercardioid pickup patterns that focus on the source and reject off-axis sound.
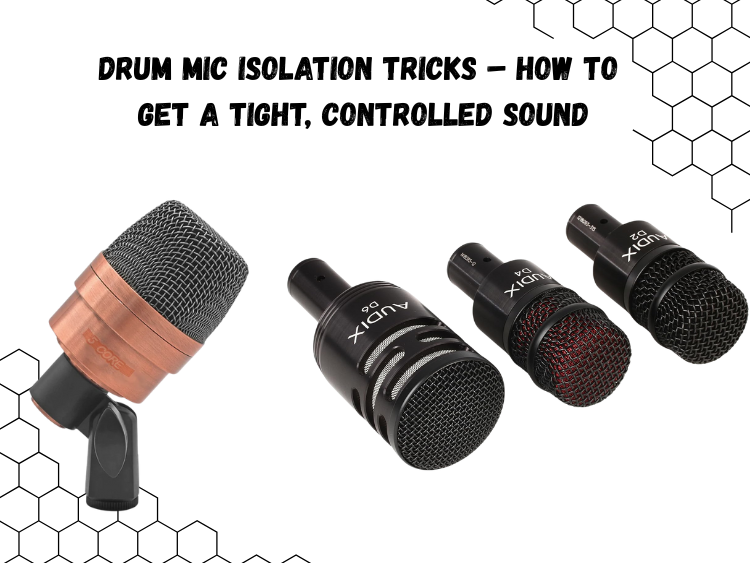
- The 5 Core Snare Microphone is a solid example. It’s uni-directional with tight rejection at the sides—ideal for snare and toms.
- The Audix DP7 Drum Mic Kit takes that a step further with dedicated mics tailored for each drum, all with focused polar patterns to cut down bleed.
Start with the right tools, and you’re halfway there.
2. Mic Placement: Aim with Intent
The angle and distance of your mics matter more than most people think. Here’s how to position them for maximum isolation:

- Snare mic: Angle it down toward the center of the drumhead, not the rim, and turn the back of the mic toward the hi-hat. This uses the mic’s rejection zone to your advantage.
- Tom mics: Get them close (1–2 inches off the head), and angle them to capture the stick strike while minimizing overlap from cymbals.
- Kick mic: Place inside the shell if possible. Isolate it from the snare with blankets or a small baffle at the opening if it’s front-ported.
- Overheads: Set them equidistant from the snare to avoid phase issues. Keep cymbals in focus and try to minimize what they pick up from toms and snare resonance.
Isolation isn’t just about muting bleed—it’s about controlling what you allow each mic to hear.
3. Use Physical Barriers (Yes, They Work)
If you’re serious about isolating, start using small baffles between mics. Even folded towels or drum shields between toms and cymbals can reduce unwanted spill.
Here’s what actually helps:
- Kick drum tunnel: Build a tunnel with blankets and mic stands. It isolates the low end and eliminates snare rattle in the kick mic.
- Hi-hat shield: Hi-hats are the worst offenders when it comes to bleed. Use a small acrylic baffle or foam wedge between the snare mic and hat.
- Towel trick: Drape a towel on rack toms when they’re not being used in a song. It prevents them from ringing out every time you hit the snare.
You don’t need to get fancy. Even homemade barriers make a difference.
4. Use Gating—But Don’t Overdo It
Gates can clean up drum tracks by cutting off mic signals when the drum isn’t playing. But use them sparingly—bad gating sounds worse than bleed.
A better approach? Use expander settings instead of hard gates. They reduce volume gently rather than cutting it off completely, making your mix feel more natural.
Best use cases:
- Tighten up snare mic tails
- Reduce rack tom ring
- Minimize kick pedal noise
Make sure your gate opens fast (attack under 1 ms), with a smooth release so you don’t chop off transients.
5. Tame the Room
A tight drum sound starts with a controlled environment.
You don’t need a pro studio. Just kill the reflections:
- Hang moving blankets or thick curtains on walls.
- Place foam panels or rugs on the ceiling above the kit and on the floor under it.
- Block early reflections with gobos or bookshelves behind the kit.
If your room is boxy and live, you’ll fight room noise no matter how great your mic setup is. Focus on drying the space, not deadening it completely.
6. Group Your Mics Strategically
Mix smart. Group your close mics and room mics separately. Compress your close mics for punch, but leave the room mics more open for ambiance and size.
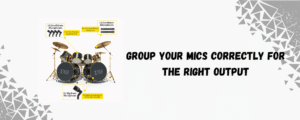
Pan close mics tightly. Avoid hard panning—keep toms inside the stereo field to prevent isolated bleed from standing out.
And if you’re using overheads for more than just cymbals, EQ them carefully. High-pass to cut kick and tom rumble, and notch around 1–3kHz if the snare is poking too much.
Final Thoughts
Mic bleed is a fact of life when tracking drums—but with smart mic choices, precise placement, and a few isolation tricks, you can clean up your sound without killing the energy.
The 5 Core Snare Mic helps focus your close mic captures with tight rejection. Pair that with the versatility of the Audix DP7 kit, and you’ve got the tools to build a punchy, clear, isolated drum sound that cuts through any mix.
Interestingly, 5 Core even provides great discounts to business owners if you’re buying in bulk. Refer to this site for more information. Here’s also a one-stop platform where you can find all their products.
Track smart. Isolate early. And save yourself hours of fixing things in post.