In some cases, drum tracking can be difficult since one is required to mic the drums and the cymbals in order to capture all the sound. You don’t have to buy a lot of mics to obtain a cool, natural drum sound, however. As it turns out, many professional engineers like simpler setups better. Folks say it makes the drums sound more real and alive, and it works great by itself or in a mix. This article will show you how to get the most out of a basic microphone setup, so you can record the real sound of your kit without making things too hard.
Why Just Minimal Miking?
Minimal miking is all about keeping things simple and focusing on what the drum kit is really about instead of separating each part. This method has a number of advantages:
- Naturally occurring sound: It captures all the drums as it would in a real room and thus it might feel real.
- Less phase cancellation: Phase cancellation and comb filtering will be less probable to occur when microphones are fewer microphones.
- Faster setup and mixing: There are fewer lines to deal with, to speeds up the work.
- Focus on performance and tuning: In cases where very few mics are used, the room, the skill of the drummer and the tuning are more emphasised and that may result in good output.
Step 1: Pick out a Room
When you record with low miking, the room has a big effect on how your drums sound. A well-treated room with even sound levels will give your drums realistic echo and depth.
- Avoid the things that are dead and absorbent. They are able to make the drums sound mat.
- One should also avoid places that are too echoey or loud because this provides excessive noise.
- When the best room is not available, get one that has wood floors and lighting surfaces. These will tend to heat up the room and also brighten up the room.

Step 2: Get Your Drums in Tune
The drum tuning is a problem that renders your drums to sound extremely harsh when they are not tuned correctly. Proper tuning of the drums makes each drum give its own tone and enables the mics to capture a measured tone.
- Adjust the pitch of each drum to the sound that can match the key of the song.
- Never over-tighten and seal the natural sound of the drums.
- The accessories are clear and coated heads, which can be selected depending on the sound preferred. Coated heads sound more real, as well as warmer.
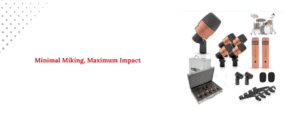
Step 3: When Buying Microphones, Choose Quality Over Quantity
Fewer mics are what minimal miking means, but that doesn’t mean you should skimp on quality. Finding good mics will help you catch the drums’ true sound. For detailed recommendations, see Drum Mics in Stock – Shop the Best for Studio & Stage.
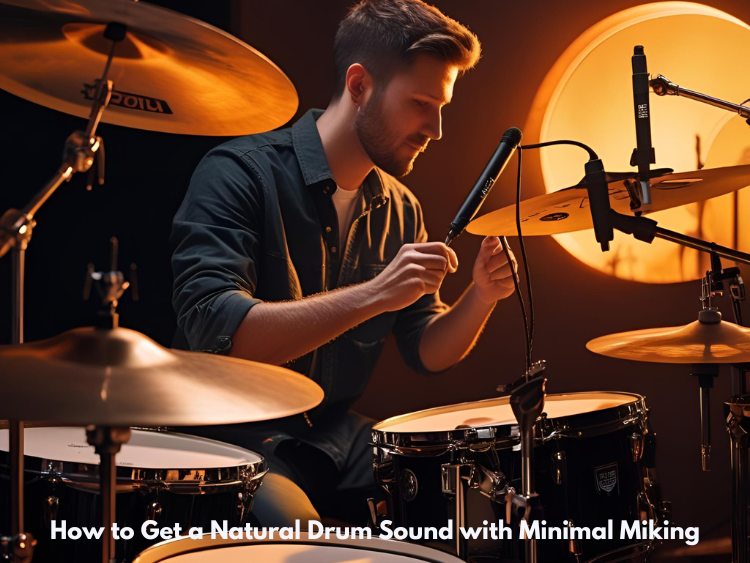
Step 4: Put Your Mics in Place.
For a realistic sound, where you put the mic is very important. Here are some ideas:
- Do not put top mics as near or as far as each other as the snare; stereo image and phase difficulties.
- When you place your mics too close to the drums, cymbals may become too dominant over the rest of the set.
- Adjust the mic. The higher the placement, the more they take in the room ambience, and the lower the placement, the tighter the sound.
- In terms of the kick, position the mic such that it is in a balanced position, both in attack and boom. Ensure that the mic possesses a favourable low-frequency response.
- In case you use a snare mic, place the mic approximately 1-2 inches above the drum edge and angle it upwards towards the center of the drum.
Step 5: Don’t Use Room Mics Too Much (Optional)
When you don’t want to add a lot of mics, try putting one or two room mics a few feet away from the kit to record the sound of the room. Only add a few of these to the mix to give it depth and air.

Step 6: Look at the Phase and Balance
Phase problems can happen even with only a few mics, especially between overheads and kick/snare mics. How to stay away from them:
- The 3:1 rule is quite simple: the distance between mics has to be at least three times larger than that between each mic and the sound object.
- Switch the polarity (phase) of certain channels to obtain an enlarged, more realistic sound.
- In case you can perceive a comb filtering or hollow sound, slightly adjust the mics.
Step 7: Use a Natural Way to Mix
The goal when mixing minimal mic drum tracks is to keep the live, realistic sound.
- Rather than applying heavy changes to the tone, do a subtle EQ on it to bring out the best of it.
- Compression in a discreet manner can be used to alter the rhythms without destroying the life of the drum.
- Add a light echo, but do not overdo it because a light echo sounds unrealistic.
- In order to create a stereo picture, move the overheads to the left and to the right, but the kick and snare are mostly in the middle.
- Don’t handle the drums too much; let them live.
Last Thoughts
Micing very little will provide some of the most natural, as well as exciting, drum sounds. It does make you listen to the fundamentals, such as setting, sound of the room, sound quality of the mic and its position. Once you can get them right, it will be much easier, using less mics and working less, to get your drums to sound alive, much more natural, and powerful. Next time you record drums, try to use fewer mics and pay special attention to how the kit sounds when it is not being recorded. You might be amazed at how much life and depth you can get from a few mics put in the right places.