Acoustic drums and live shows go hand-in-hand—but when you’re working with an electronic kit, the rules change. You don’t need to fight cymbal bleed or mic placement. You don’t even need traditional mics in most cases. But you do need a plan—because bad live electronic drum sound is painfully easy to screw up.
Whether you’re gigging in small clubs, church stages, or full-blown arenas, getting a clean, powerful electronic drum mix starts with understanding how to route, mix, and amplify your setup the right way. Here’s how to dial in your e-kit for a live show that sounds as good as it feels to play.
Do You Even Need Mics for Electronic Drums?
Short answer: No. But that doesn’t mean you skip the setup.
Electronic drums don’t produce acoustic sound that needs to be “picked up” by microphones. Your pads trigger internal samples—those samples go through your drum module, and the module sends audio out through line outputs.
So instead of miking drums, you’re amplifying and routing signals.
But here’s where most players mess up: they rely on a single mono output straight into the house system. What happens? Flat tone. Muddy kick. No punch. The crowd hears a watered-down version of your playing.
If you want your kit to sound full and alive, treat it like a multi-mic acoustic kit—just with direct signal paths.
Step 1: Use All the Outputs on Your Drum Module
Most decent drum modules offer multiple outputs—usually stereo main outs and maybe a couple of assignable aux outs. Don’t ignore them.
Split your signal so that key elements (like kick, snare, and stereo toms) have their own output paths. This gives the front-of-house engineer actual control over the mix.
Let’s say you’re using a Roland TD-27. Route the kick out of the mono left output, snare from the right, and toms/cymbals through an aux out. This separation lets you EQ and compress each element individually—just like real drums.
If your module only has stereo outs, that’s fine too—but use both, and make sure your panning is tight before soundcheck.
Step 2: Balance Your Internal Mix
Before anything hits the PA, the mix coming out of your drum module needs to be rock-solid. This is your internal blend of pad levels—kick, snare, toms, cymbals, and any backing tracks or click (if you’re using them).
Spend time balancing this in your module settings. If your snare feels buried or your cymbals are too shrill, fix it at the source—not at the mixer.
A clean signal going out = fewer surprises later.
Step 3: Use a Reliable DI Setup
Most PAs expect balanced XLR or ¼” TRS inputs. If your module outputs unbalanced signals (like many e-kits do), you’ll need a direct box (DI) to convert the signal to something the mixer can handle cleanly.
Passive DIs work for basic setups. But for stage-heavy environments or long cable runs, an active DI with ground lift and pad options is safer.
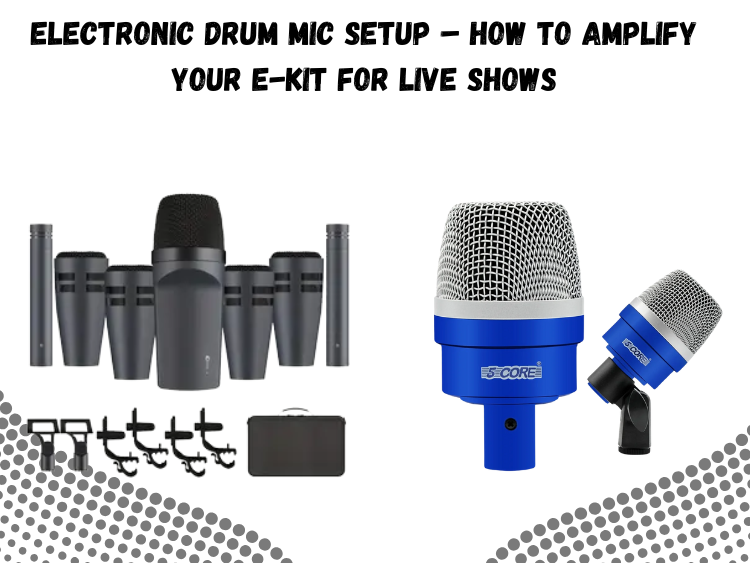
If you’re running multiple outputs, you’ll need a DI for each channel. That’s where a kit like the 5 Core 7-piece drum mic kit can come in handy. Yes, it’s a mic set—but it’s the hardware accessories inside—clips, mounts, and adapters—that help you keep cables clean and connections secure, especially if you’re routing pads like real shells.
Step 4: Monitor Yourself Clearly
Even the best front-of-house sound won’t help you if you can’t hear your own playing. For e-kits, your monitor mix is everything.
In-ears are the gold standard. They isolate external noise, prevent bleed, and let you monitor click tracks or backing sequences without blasting the stage.
If that’s not an option, use a dedicated drum amp or powered monitor. Something with decent low-end response, like the Roland PM-200 or Headrush FRFR-108, gives you that “kick-in-the-chest” feel without overwhelming the rest of the band.
Just keep it aimed at you—not the audience.
Step 5: Feed the House Mixer Like a Pro
Whether you’re running two outputs or six, label your lines clearly and communicate with the sound engineer. The cleaner your input list, the smoother the setup.
Here’s a simple breakdown for a 4-line rig:
- Kick – Channel 1
- Snare – Channel 2
- Toms/Cymbals (Stereo) – Channels 3/4
Each one goes through a DI, then straight to the mixer. No mystery, no guesswork.
If you’re using a professional multi-channel preamp or DI setup, your signal’s going to hit that board clean and noise-free.
What About External Mics for E-Drums?
There’s one situation where you might mic an e-kit: blended hybrid setups.
If you’re using real cymbals, a side snare, or an acoustic kick with your pads, those will need traditional mics. That’s where the 5 Core mic kit shines again. Even in a digital setup, it’s a solid backup for integrating real elements or keeping a spare on hand if something fails mid-show.
Final Take
Miking an electronic drum kit isn’t about capsules and condensers—it’s about clean signal flow, smart routing, and treating your rig like the real instrument it is.
Split your signals. Use DIs. Balance your mix before it hits the board. And don’t skimp on monitoring.
Whether you’re running a compact two-channel setup or a fully split multi-line rig, how you amplify your e-drums can make or break your live sound. With a solid system, a clean stage, and the right tools—like the 5 Core drum mic kit—your electronic kit will hit just as hard as its acoustic counterpart.


