Tom drums are often the unsung heroes of a kit—adding weight, drama, and movement to a groove. But if you get the mic placement wrong, all that power turns into mud or clicky thuds. Proper tom mic placement isn’t just about sticking a mic above the head and hoping for the best. It’s a matter of understanding positioning, angles, and how the toms interact with the rest of your kit.
This guide breaks it all down, so you can capture resonant drum sound that holds up in mixes—whether you’re tracking in a studio or your bedroom.
What You’re Really After: Tone and Definition
You want your toms to sound full, natural, and isolated enough to sit cleanly in a mix. If you get too close, you risk choking the tone. Too far, and you bring in too much bleed. The trick is to find that sweet spot—where the attack, body, and sustain of the drum come through clearly.
Starting Point: Angle and Distance
Let’s talk placement. A general rule of thumb:
- Position the mic 1–3 inches above the drumhead
- Angle it toward the center of the drum
- Avoid pointing it straight down
Why? Miking directly downward emphasizes attack but loses body. Angling the mic gives you more of that low-end resonance without overloading on click or snare bleed.
Start with a 45-degree angle, aimed slightly toward where the stick hits the head. That gives a solid starting tone you can tweak from there.
What About the Bottom Head?
You might be tempted to mic the bottom (resonant) head too. Unless you’re in a pro studio with plenty of inputs and phase-alignment tools, skip it. Bottom miking adds complexity and often introduces phase issues that kill your tone if not managed carefully.
Stick to top mics unless you know what you’re doing. You’ll still get that round, full-bodied tom sound with less hassle.
Mic Choice Makes a Difference
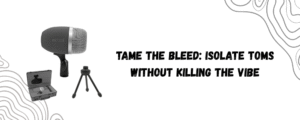
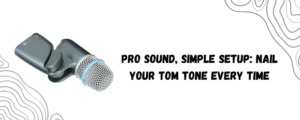
Dynamic mics are the go-to for toms. They can handle high SPL, reject bleed, and bring out midrange punch. A solid example is the 5 Core Tom Mic, designed to focus on that attack-heavy but warm tom tone.
Interestingly, 5 Core even provides great discounts to business owners if you’re buying in bulk. Refer to this site for more information. Here’s also a one-stop platform where you can find all their products
It’s also built with a cardioid pickup pattern, which helps isolate the drum from cymbals and snare, keeping your mix cleaner.
Even budget-friendly options like this one can get the job done if positioned correctly.
Mounting Techniques: Clamp It Right
Use rim clamps or low-profile mic holders to keep your setup tight. Avoid bulky stands that crowd your kit and block cymbals or sticks. The closer and more stable your mount, the better your positioning—and the less chance your mic moves mid-session.
Make sure the mic isn’t hovering directly over the path of the stick. A few inches to the side makes a world of difference in both sound and durability.
Dealing with Bleed
Tom mics will always pick up some cymbal and snare bleed—it’s part of the game. But you can reduce it significantly by:
- Angling the mic away from cymbals
- Using a cardioid mic to reject off-axis sound
- Keeping the mic as close as possible without choking the tone
Also, listen in solo and in context. Some bleed adds natural ambience. Too much kills clarity. Don’t obsess—just be intentional.
Tuning and Head Selection Matter More Than You Think
Before you hit record, make sure your toms are tuned properly. No mic in the world can fix poor tuning.
- Use coated heads for warmth, clear heads for brightness.
- Make sure there’s no buzzing or rattling.
- Dampen only if needed—overdamping kills resonance.
Mic placement can only enhance what’s already there. Garbage in, garbage out.
Final Positioning Recap (For Quick Setup)
Here’s a quick cheat sheet if you’re setting up in a rush:
- Distance: 1.5–2 inches above the head
- Angle: 45 degrees toward the center of the drum
- Offset: Avoid dead-center placement; favor edge of strike zone
- Height: Low profile, but safe from stick hits
- Mic Type: Cardioid dynamic
Final Word
Recording toms properly doesn’t require a giant rack of gear—it requires intentional mic placement and a tuned kit. That’s it.
Start with one well-placed mic per tom, use a tool like the 5 Core Tom Mic, and adjust based on what your ears are telling you—not what a YouTube comment section says.
Because at the end of the day, getting a great resonant tom tone is about using what you have and placing it where it counts.


