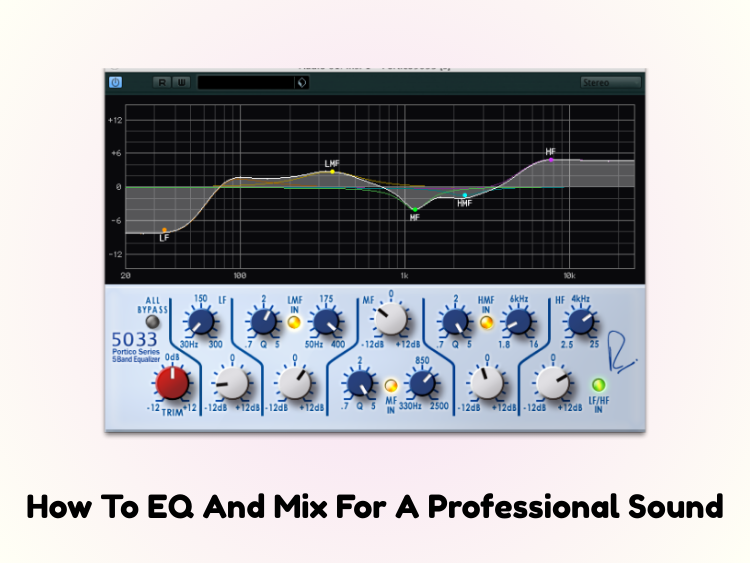
Drums are what give a track its energy. They set the vibe, keep the rhythm, and bring a mix to life. But if they’re not mixed right, they can end up sounding off. The secret? Good EQ and a solid mix. Whether you’re working in a home setup or a pro studio, knowing how to shape the sound of each drum mic can make a huge difference. So here’s a step-by-step guide to help you mix and EQ your drum mics for a smooth, powerful sound.
Choosing the Right Mics for a Solid Drum Sound
Make sure the drums are caught well before you add EQ or effects. A lot depends on where the mic is placed, how it is tuned, and how good the drums are. No matter how good you are, it’s hard to fix a drum kit that wasn’t caught well in the mix.
Pick up the right tools to:
- Kick Drum: A dynamic mic like the AKG D112 or the Shure Beta 52a.
- Snare: A Shure SM57 is on top, and maybe another one is below it.
- Toms: Mics that move close to the head.
- Overheads: Sensitive microphones set up in an ORTF, XY, or spaced pair arrangement.
- Room Mics: Condensers are set up a few feet away to get a sense of depth.
If you’re looking for reliable mics, the 5 Core Conga Mic Snare & Tom Microphone Drum Kit offers a great solution, with quality condenser and XLR mics for capturing detailed sound.
Set Up Your Drum Mix
Label your files and put them into groups. Make groups or subgroups:
- Kick
- Snare
- Toms
- Mics in the room
- Drum Bus (putting everything together)
It’s easier to handle and balance the amount later when you have sections.
Make the Kick Drum Sound Better
The kick needs to be strong and sharp.
EQ moves that might help:
- Low Cut: To get rid of rumble, roll off below 30–40Hz.
- Boost: 60–80Hz for thump and 3–5kHz for attack/click.
- Cut: Between 300 and 500 Hz to get rid of boxiness or mud.
If you need to tighten the sound, add compression. The punch will be stronger if you hit slowly and let go slowly.
Make the Snare Drum Sound Better
The snare often gets the most attention:
- Low Cut: Remove frequencies below 80Hz.
- Boost: 200Hz for body, 5–8kHz for crack and snap.
- Cut: If boxy or harsh, reduce 400–600Hz.
- Tip: Adjust the top and bottom snare mics’ orientation, then layer and mix to taste.
Make the Toms Sound Better
Toms should be loud and clear without being too much for the mix.
EQ moves that might help:
- Low Cut: Below 50 to 60 Hz.
- Boost: (based on size) 80–120Hz for body and 4–7kHz for attack.
- Cut: 400–600Hz to get rid of the boxiness.
Eliminate bleed between hits with gates or automation, especially for rock and pop mixes.
Level Up the Overheads
Overheads record not only the drums but also the whole kit.
EQ moves that might help:
- High-pass filter: Around 100–150Hz to cut down on low-end bleed.
- Boost: 10kHz or more for shimmer and air.
- Cut: If the drums are too sharp, cut the harshness around 3–6kHz.
Ensure the overheads are balanced and in sync with the rest of the kit.
Level Up the Mics in the Room
Room mics can make sounds bigger and more real. To enhance their impact:
- EQ Tips:
- High-pass filter: Around 80Hz.
- Boost: 150–250Hz for warmth or 2–4kHz for force.
- Cut: Reduce muddy spots around 300–500Hz.
- Squeeze the room mics (10–20dB) for added punch and energy. Adjust to match your desired mood.
Compression in Parallel
Send the whole drum bus to a secondary channel that has a lot of compression, like 1176-style fast attack/release. It is best to mix the compressed sound with the dry drums. This keeps the rhythm but adds weight and energy.
Begin by:
- Attack: Quickly
- Release: Quickly
- Ratio: At least 4:1
- Mix: 20% to 50% of the signal is squeezed
EQ and Saturation on the Bus
Use soft EQ on your drum bus to bring everything together:
- Boost: 60–80Hz a little for better low-end harmony.
- Add: 8–10kHz to make it sparkle.
- Use Saturation: For color, use tape saturation or analog emulations. You can find more on saturation in our guide on how to reduce mic bleed when recording drums.
The sound can be improved slightly or strongly with saturation plugins such as Soundtoys Decapitator, FabFilter Saturn, or Softube Tape.
The Last Balance and Automation
You can use level automation to draw attention to fills or certain parts. Pan the toms to match the view from the kit (the crowd or the drummer). Ensure that the drums don’t take over and that the kick and snare are at the forefront of the mix.
Conclusion
It takes skill, a good ear, and close attention to detail to EQ and mix drums. Carefully sculpting frequencies and thoughtfully placing each mic will result in drums that stand out and sound professional. Always remember that the best drum sounds are made from the ground up. Begin with good recordings, then use EQ to shape the sound, and be creative with how you change the dynamics.


