
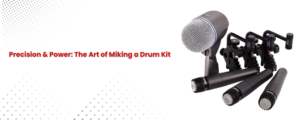
If you want your drums to sound clear, punchy, and balanced in front of a big crowd, you need to mic your drum kit before you play live. Having a good microphone for your drum kit can make a big difference in how it sounds, no matter how big or small the venue is. Even though the sound in each place will be different, there are some basic techniques and tips that will help you get the best sound from your drums when you play live. Here is a step-by-step guide on how to mic a drum kit for live shows, along with tips from the pros for the best results.
Use the Right Microphone Types
Picking out the right mics for each drum is the first thing that needs to be done when miking a drum kit. Durability and the ability to handle high sound pressure levels (SPL) are very important for live shows. Most of the time, dynamic microphones are used for close mics. Condensers or ribbon mics are used for overheads and room mics.
- Kick Drum: To record the kick drum’s deep punch and low-end thump, a dynamic mic like the Shure Beta 52A or AKG D112 is best.
- Snare Drum: If you want to record the sharp crack of the snare drum, use a dynamic mic like the Shure SM57. This will block out noise from other drums.
- Toms: Sennheiser e604 or Shure SM57 dynamic microphones are great for Toms because they give clear, strong sound without distortion.
- Overheads: Condenser mics like the Audio-Technica AT2020 or Neumann KM184 are perfect for capturing the cymbals and the overall kit sound in more detail.
- Hi-Hats: A small-diaphragm condenser mic like the Shure SM81 is ideal for miking the hi-hats, picking up their crisp and clear high frequencies.
Proper Mic Placement
The placement of your microphones plays a significant role in how your drums will sound during the performance. Here are some placement tips for each drum:
- Kick Drum: Put the mic close to or inside the front hole of the bass drum if you want to record it. This position gives you a strong attack and a low-end punch. Moving the mic closer to the batter’s head will add more attack. Moving it closer to the beater will add more sub, and so on.
- Snare Drum: Hang the mic about two to three inches above the middle of the snare head and tilt it slightly toward the edge of the drum. This placement helps get the clear snap of the snare lines without distorting the sound.
- Toms: Put the mic just above the tom’s head, about 2 to 3 inches away, and point it straight at the middle of the head. You won’t hear too much cymbal bleed, so you’ll get a clear, sharp sound.
- Overheads: To record the whole drum set with overheads, put the mics about 3–4 feet above the kit and slightly in front of the player. To get the best audio picture, you can try putting them in an X/Y or spaced pair arrangement.
- Hi-Hats: The hi-hat mic should be set up 45 degrees above the drums, about 3 to 4 inches from the edge. This placement makes sure that the mic picks up the clear sound of the hi-hat while reducing noise from other drums.
Use a Subkick for Extra Low-End
If the kick drum needs to have more low-end power at your place, you might want to use a subkick mic. A subkick is usually a speaker that has been turned into a microphone. It picks up low-frequency sounds that normal microphones might miss. This is generally put near the kick drum’s shell or in the port hole. It gives the sound more fullness and depth.
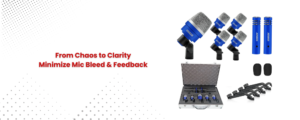
Minimize Mic Bleed and Feedback
To get clean drum sounds during live shows, it’s important to keep mic bleed and noise under control. To help, here are some ideas:
- Use Directional Mics: Directional mics, like those with cardioid and super-cardioid patterns, are great for blocking sound from sources you don’t want to hear. Place the microphones close to the drumheads and make sure they are at an angle so they don’t pick up too much noise from other parts of the kit.
- Use Drum Shields: If your drum kit is loud, you might want to use clear drum shields to cut down on the sound that leaks from the drums into other microphones, especially overhead and voice mics.
- Adjust EQ and Gain: When recording live, the EQ on each mic should be tweaked to get the best tone from the drums while preventing noise. If you don’t want low sounds that can mess up the mix, a high-pass filter can help.
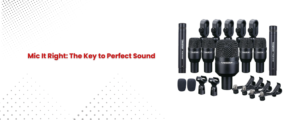
Consider Using a Drum Mic Kit
If you’re new to miking drums or seeking an easy, reliable setup, try using a drum mic kit. Many of these kits have microphones for every component of your drum kit like kick, snare, toms, and overheads. Favored collection includes the Shure DMK57-52 (four SM57s for snares and toms, plus a Beta 52A for the kick) or the 5Core Drum Mic Kit (which has everything you need for a full kit). These kits take the headache out of choosing individual mics and give you everything you need to achieve a great live drum sound.
Soundcheck and Adjust the Levels
After positioning all the mics, sound-checking begins. Start by adjusting the levels of each mic so that none of them are skipping or staying too quiet. If you include enough snare, kick, and toms in the mix, the overheads will cover the whole width of the kit. Furthermore, keep an eye out for unwanted noise or interference and make the necessary changes to the mic placement and levels.
Monitor the Drum Mix During the Performance
Last but not least, make sure the sound of the drums is properly checked during the show. To get a good sound of the drum mix, live sound engineers usually use in-ear speakers or wedge monitors. During the set, changes may need to be made to make sure the drums sound good with the other instruments.
Conclusion
When it comes to live performance, Miking a drum kit is one of the most important skills to learn in order to get the best sound. Choose the right microphones, get them in the right spot, and minimize bleed, and you are guaranteed some clear, punchy, balanced drums every time you hit record! With a good sound check and monitoring, you can bring a powerful and dynamic drum sound that should carry through to the audience.