
Capturing the full energy of a drum kit is one of the trickiest challenges in audio engineering. Whether you’re tracking in a home studio or getting ready for a live gig, miking drums is never just about throwing up a few mics and pressing record. The real magic comes from intentional mic placement, understanding bleed control, and matching the right mic types to the right drums.
If you’re looking for professional drum sound without hiring a pro engineer, this guide walks you through every major drum miking technique—one step at a time.
Step 1: Know Your Kit and Your Room
Before touching a mic, take stock of your space. Is it a tight room with reflective walls? A treated studio? Or maybe a stage setup?

Room acoustics play a bigger role in mic placement for drums than most people realize. A cheap mic placed properly in a good room will outperform an expensive one in a bad space.
Also, be sure your drum kit is tuned properly. Mic’ing a poorly tuned snare or a boomy kick is just going to amplify those problems.
Step 2: Start With the Kick
The kick is the foundation. You want a mic that can handle high SPL, with a frequency response that emphasizes lows and upper mids.
Place your mic just inside the hole of the resonant head (if it has one), pointing toward the beater for more attack. Pull it back a few inches for a rounder, fuller tone. Avoid placing it dead center unless you’re intentionally after a super punchy, modern metal-style sound.
Kits like the 5 Core 7-Piece Drum Mic Kit include a dedicated kick mic that’s pre-tuned for this frequency range, saving you some hassle.
Interestingly, 5 Core even provides great discounts to business owners if you’re buying in bulk. Refer to this site for more information. Here’s also a one-stop platform where you can find all their products.
Step 3: Mic the Snare Like You Mean It
The snare’s crack cuts through everything. You want it bright, snappy, and isolated. Use a cardioid dynamic mic and place it about 1–3 inches above the drum, angled toward the center of the head.
Be careful with the hi-hat bleed—angle the mic slightly away from the hats to minimize spill.
Some drummers like miking the snare bottom too. That’s where the sizzle lives. Just flip the phase on that channel to avoid cancellation with your top snare mic.
Step 4: Get the Toms Right
Toms often get overlooked, but bad tom miking kills an otherwise clean mix. Use clip-on dynamic mics and angle them toward the center of each head, roughly 1–2 inches off the surface.
Try to keep the angle around 45 degrees. This minimizes bleed and gets the best resonance.
If you’re working with a full drum mic set like the 5 Core DM-7ACC-BLK, you’ll have all the tom mics you need with clamps ready to go—huge time-saver for live setups.
Step 5: Overhead Placement – The Make-or-Break Factor
Overheads capture the overall balance and space of the kit. Think of them as the glue that holds everything together.
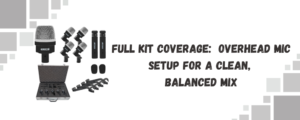
Use a matched pair of condensers. The classic XY setup gives you tight stereo imaging and helps minimize phase issues. If you’re in a room with decent acoustics, space them wider for a more natural, open sound.
Place them about 2–3 feet above the cymbals, equidistant from the snare to avoid phase smearing.
For tighter control, angle one mic more toward the hi-hat and the other toward the ride cymbal. This is especially useful in live settings where cymbal bleed can overpower toms.
Step 6: Optional – Hi-Hat and Room Mics
A dedicated hi-hat mic can help if you’re playing intricate patterns, but often your overheads will do the job just fine. If you do use one, keep it off-axis to the hats and about 5–7 inches away.
Room mics, on the other hand, are all about depth. Place them at ear level several feet from the kit—wherever the room sounds best. If you’re tracking rock or jazz, adding room mics can completely change the energy of the recording.
Pro Tips to Avoid Rookie Mistakes
- Watch your phase: Especially between snare top/bottom and kick/overheads.
- Less is more: You don’t need 12 mics to get a killer sound. Four well-placed mics can outperform a cluttered mess of nine.
- Use headphones while placing mics: What sounds good live doesn’t always sound good in the mix.
- Label your cables: You’ll thank yourself during the mixdown.
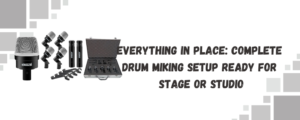
One Kit, One Solution
If you want everything in one bag—kick, snare, toms, and clips—the 5 Core drum mic set takes the guesswork out. Each mic is color-coded, fitted for a specific drum, and comes in a rugged case with clamps included.
Similar kits, like this unbranded 7-piece set also offer solid value for beginners looking to build out a reliable rig.
Final Thoughts
You don’t need a professional studio or a $3,000 mic locker to get a polished drum sound. What you do need is smart mic placement, a clear understanding of your space, and gear that won’t fall apart after one gig.
Whether you’re recording your band’s next demo or trying to upgrade your live sound, learning how to mic drums properly is the real game-changer. Practice your setup, experiment with placement, and trust your ears—not the marketing hype.