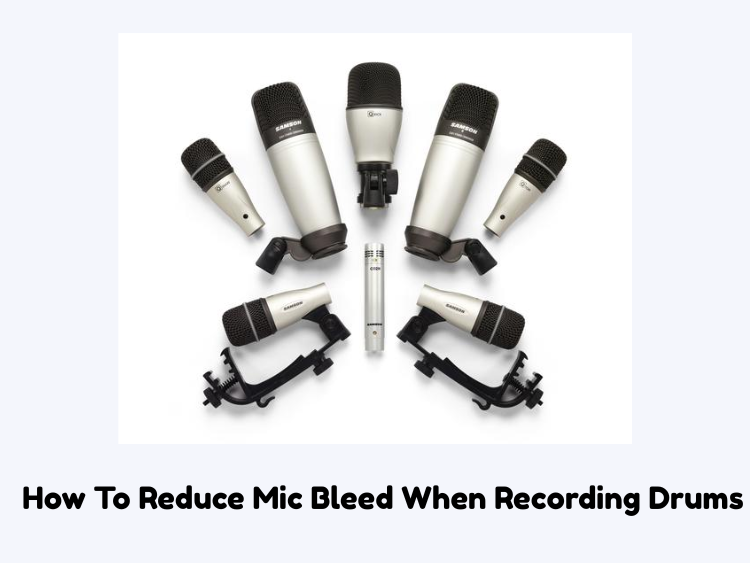
Drum recording is always a potential nightmare when managing mic bleed. One of the common problems we encounter when recording drums is known as mic bleed. Although some bleeding is unavoidable, excessive mic bleeding leads to phase problems, muddiness, and challenges in the mix. These are useful methods of mic bleed reduction when recording drums.
Optimize Mic Placement
The first step in minimizing mic bleed is mic placement. Consider these strategies:
- Close Miking: You want to get the microphone as close to your sound source as you can while still allowing the tone to sound natural. This helps isolate each drum.
- Use Angle Mics Strategically: When possible, angle microphones away from other sound sources to minimize unintended noise pickup.
- Directional Mics Amplitude: Cardioid and hyper-cardioid polar patterns are great for rejecting off-axis sound bleed from adjacent elements.
- Overhead Placement: Place a spaced pair, XY, or ORTF above the drum kit to capture a balanced drum sound while minimizing excess bleed.
Select the Right Microphones
When recording, the correct microphones can make a massive difference in the amount of bleed you get:
- Dynamic Mics: Ideal for close miking, as they naturally reject off-axis sound (Shure SM57 for snare, Sennheiser MD 421 for toms).
- Condenser Mics: Great for overheads and room mics, but capture more ambient sound.
- Ribbon Mics: Warm sound, good rejection of high-frequency bleed.
- Boundary Mics: Good for use in kick drums, or on floors, to pickup low-end but minimize bleed.
Noise Gates and Processing
Audio noise gates are used in post-production to remove bleed when the drum you want isn’t being played.
- Gating: Set Proper Thresholds: This means that you set the gate where it opens when the drum is hit but closes when NO signal is present.
- Implement Sidechain Gating: Enable the gate to respond to another drum’s impact for tight cutoff.
- High-Pass Filters: To help minimize kick drum bleed from cymbal and overhead mics, roll off low frequencies.
Tune and Damp the Drums
Control bleed by reducing unnecessarily resonant overtones.
- Moongel or Dampening Rings: Apply to toms and snare for sustained control.
- Pillow or Blanket Inside Kick Drum: Putting a pillow or blanket inside the kick drum helps reduce resonance.
- Example: Proper Tuning: Well-tuned drums clean up unwanted frequencies that may bleed into other mics.
Use Mic Isolation Techniques
Mic separation and the use of physical barriers can dramatically cut down on mic bleed.
- Goboes and Acoustic Shields: Put little walls near mics to keep off-axis sound from leaking.
- DIY Isolation Panels: Use foam boards or blankets to create some type of makeshift isolation barrier to absorb sound that you do not want to hear.
- Drum Shields: A full or partial acrylic drum shield can reduce overall bleeding in live recording scenarios.
Optimize Room Acoustics
Mic bleed is something that can be controlled in the recording environment.
- Absorptive Panels: Position foam panels, diffusers, or bass traps around the drum kit to reduce reflections.
- Carpets and Rugs: Rugs can be placed underneath the drum set, as well as right around it, to minimize floor reflections and reduce excess bleed.
- Room Size: A smaller room means less natural reverb that leads to bleeding.
Improve Playing Technique
Mic bleed is frequently caused by a lack of consistency in playing dynamics.
- Playing Balance: Encourage drummers to play with a softer touch on the cymbals and give a healthy sound on the drums for a balanced mix.
- Stick Heights Consistency: Dominating stick heights can avoid accidental loud hits on a cymbal.
- Hand Technique: Striking cymbals appropriately lowers bleed into tom/snare mics.
Record in Separate Takes
Split vocals into verses and choruses (if the song lets you) to greatly reduce mic bleed.
- Leaving Out Cymbals: Record the drums first without cymbals, and overdub the cymbals in the next session.
- Isolated Percussion Recording: Aux percussion should be recorded separately to keep it clear.
- Track in Layers: Record drum parts bit by bit to have the least bleed.
Utilize Phase Alignment Tools
Double tracking can split the phase and cause cancellation of frequencies.
- The Output Phase: Before hitting the record, switch the polarity on some mics and check if the sound improves.
- Use a Phase Plug-In: Digital post-tools can edit phase alignment.
- Manually Align Transients: Manually aligning recorded waveforms to fit transient peaks can help with phase problems.
EQ Tips & Tricks: Post-Production Editing
Now let go of surgical EQ: A surgical sounding one, as in very precise cuts, removing unwanted frequencies without touching the actual tone of the drums.
- Multiband Compression: Use multiband compression to tame troublesome frequencies that contribute to bleed.
- This manual editing can involve cutting sections of large bleed in a DAW, if needed.
Conclusion
Strategic mic placement, gear selection and treatment, and playing techniques will help reduce mic bleed in drum recordings. Audible bleed is not always a bad thing, as some can add a bit of realism to the final sound as well when mixed, but it can easily result in fights in mixdown. These techniques will help you to achieve a cleaner, more professional sounding drum recording that gives you the ability to tweak each drum sound individually.